Let's talk about the happiness of confetti for a moment, shall we? Now I know not everyone is a fan of that invitation that you rip open over that rug you just vacuumed 8 minutes prior and out comes this microscopic sized confetti with some heavy duty static cling thrown in there for good measure.
Showing posts with label party diy. Show all posts
Showing posts with label party diy. Show all posts
April 21, 2014
January 24, 2014
Mini Love Notes on a String
(she says with her tail tucked between her legs)
Is there a way to blog and have a life? I just need to know. I am constantly lamenting this to you yet I have found no viable solution that will enable me to craft and blog while meeting the needs of my family. Who comes unequivocally first.
But this space gives me such joy...such satisfaction using gifts that only a creative God could give. I love using my hands to create things yet I see how life is literally fast forwarding and I miss it when I am staring at a bright glowing screen that draws me in and then traps me there until I can shake myself out of it. I know there are people who can do this...this balance thing. But for me....someone gets the short end of the stick and it s often at the cost of someone I love.
Labels:
holiday diy projects,
party diy,
Valentine's Day
August 15, 2013
DIY Tissue Paper Wall Flowers
Hey friends! So as promised I thought I would share some of the fun stuff I made for Cati's party. Here are the fun wallflowers which was pretty simple. I did this the way you would a fabric flower.
Here we go...
August 13, 2013
Tinkerbell Party + DIY Ideas

I am really excited to show you Cati's beautiful birthday party from yesterday. I was pleasantly surprised how this party came together on a budget. I was forced to get creative and it turned out better than I had hoped.
Labels:
diy parties,
diy tablescapes,
kids parties,
party diy,
pom poms,
yarn
August 8, 2013
Tinkerbell Party Favors
How bout how I came back to blogging and then just left again? Seriously, I have the best intentions to stay consistent but there is this thing called LIFE that keeps me adjusting my priorities and blogging always gets kicked to the curb. I am feeling like eating, clean clothes and house, driving my kids to VBS, planning and being present in my girl's life and birthday parties (instead of blogging about them) take precedence. But it's hard to balance it all. Can I get a witness?
But when school starts in September, I am thinking I will have more time. No, really I mean it. After meal planning, laundry, cleaning, shopping, homeschooling...I will get to it when I can. :)
So Ella's astronaut party came and went. Did I take pictures? Not a lot unfortunately. We had a blast though and it hurt my heart a little that my Ella turned 5. Still young but definitely not my baby anymore. Now it is two weeks later and we are planning Cati's 7th birthday with a Tinker Bell party. So I am being intentional to share as much as I can with you.

Today I just got finished with the party favors for the girls. I thought it would be cute to gift her little girlfriends with some glitter nail polish (like pixie dust!) in little burlap bags. I made them from burlap garland and I have a tutorial for that here. This time I just made the bags a bit more narrow to fit the little nail polish bottles in there.
Labels:
favors and gifts,
kids parties,
party diy
July 19, 2013
Embellish a Birthday Candle
So I have birthdays on the brain.
My Ella turns five at the end of July and two weeks later my Cati turns 7. They used to share a party but...they are both quite different. Ella is my girl who likes all thing "boy." Last year she had a firetruck party. It's what she wanted. And my girly girl, party lovin' self can't say no because I love her more than my life and who wants to throw a party for a kid that they won't like?
So this year? An astronaut party. I actually love this idea. So we go to the party store to get ideas and she sees a number 5 candle that she wants because it is red. She is into red lately.
June 25, 2013
Decorate A Cupcake Kit
It's a happy, happy day!
Today is my birthday...yay!
(I'm 37 in case you were curious)
I love birthdays. I love parties. I love celebrating.
With that in mind, I came up with the perfect way to celebrate someone.
Wouldn't you love to get this little cupcake in box? I mean, how stinkin' fun would it be to find this sitting on your desk at work or if your little one opened their lunch at school and found this waiting for them? Here's how I did it...
Labels:
favors and gifts,
food packaging,
packaging,
party diy
May 20, 2013
Embellish Party Hats With Pom Poms

Hey friends!
Can I just love on you guys a bit first?
It's just that there is something so sweet in knowing I can stop in, throw up a quick post and know that so many of you incredible friends will be here for me. It means so much. ♥
October 8, 2012
Yarn Monster Cupcake Picks
In case some of you missed the ever popular Spooktacular over with the fabulous Eighteen25 girls, here was my project for this year...the cutest Yarn Monster Cupcake Picks I ever did see!
They are not hard to make and you only need a few supplies you probably already have in your crafty stash.
Labels:
Autumn,
cupcake picks,
Fall,
holiday diy projects,
party diy,
yarn
October 2, 2012
DIY Farm Party for Kids
I am so happy to share this sweet little farm party that I did for my little Ella's Pre-K class. This ended up being such a fun one to prepare for and I enjoyed coming up with economical ways to make it cute without breaking the bank. I knew I needed to get creative!
Labels:
Autumn,
food packaging,
kid parties,
kids parties,
packaging,
Parties,
party diy,
tablescapes
June 26, 2012
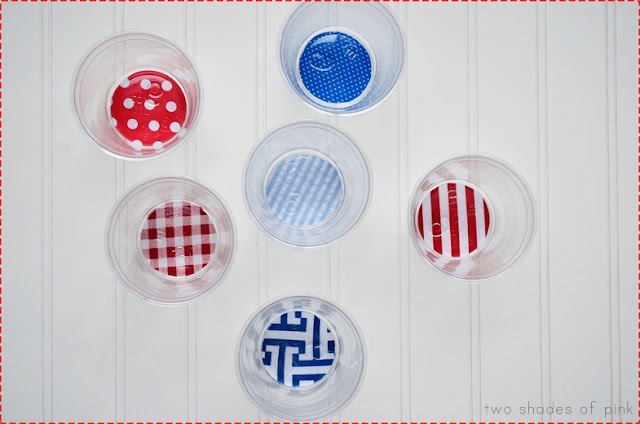
Simple 4th of July Party Cups
Hey sweet friends!
Here's a quick and easy DIY for the 4th or any other party.
I am all for some pretty mason jars or glass bottles with pretty striped straws. But if you have a big family reunion or a large party you are going to need something more practical.
Why not make custom cups with some fabric or paper?
Take some clear plastic cups and cut out fabric or paper circles and place your glue "pretty side up" with a bit of mod podge (it dries clear). Fast, easy, colorful!

Mine are both fabric and paper. I just traced the bottom of the cup but if you are using paper, you can use a circle punch too.
So easy and makes for a little custom flair to your party!
Labels:
4th of July,
holiday diy projects,
party diy
June 20, 2012
Painted Sailor Stripe Napkins Tutorial

I need to start off by saying that this year has marked the year of my obsession with stripes. I am not sure why I love them as much as I do but anything remotely nautical or preppy has me over the moon in love. So I have been dreaming of doing a Nautical 4th of July series for this year.
And I am kicking it off today. Hooray!

I really wanted to use striped napkins this year but could not find any. And so they kind of turned into an unexpected DIY project. I could not find any fabric anywhere with the stripes I wanted and the ones I found retailed at $14 each. Gah! So I figured a little fabric paint and inexpensive white napkins would do the trick. So a tutorial was born!

What you need: White napkins, red and blue fabric paint, masking tape (or painters tape), paint brush, number stencils, cardboard or poster board.
1. Iron your napkin and lay it flat on top of cardboard or poster board.
2. Carefully place one strip of tape the length of the top of the napkin. Do the same thing right underneath it with another line of tape.
3. I wanted the first stripe to be painted red so I removed the top strip of tape and placed it directly under the second one. Then I placed another strip of tape underneath that and removed the one above it again.
This is how you create your stripes all the way down.
It also helps that the tape stabilizes the napkin onto your poster board.
Now start painting the exposed white lines your red color. Once dry, peel your tape strip to reveal your fun, striped napkin!
My goal was to make the napkins look like a sailboat sail so I stenciled 0704 (July 4th) onto each corner of the napkin with a midnight blue color.

They ended up really cute! Or like a preppy prisoners uniform. Awesome! :)
A photo tutorial would have been close to impossible so here's a great link at animated knots for making a monkey's fist knot with great step by step photos.
I have more ideas to share with you over the next few weeks until July 4th.
Stay tuned my beautiful friends!
Hugs!
Labels:
4th of July,
holiday diy projects,
party diy,
tablescapes
May 15, 2012
Pinwheel on a Stick

Hello there!
I wanted to peek in with a quick and easy tutorial to make easy pinwheel picks. Yesterday I made these and the cupcakes because we celebrated Cati's birthday at school today. Her birthday is not until the end of the summer but they celebrate all the summer birthdays during the last few weeks of school.
Which is rather confusing for Cati. :) She keeps asking, "Am I six now?"
But hey...she got some yummy cupcakes out of it.
I honestly think these are more versatile then just popping them into a cupcake. Embellish a package or bag, a garland or wreath, or pop a big one into a goody bag.
 Sorry that I forgot to remove all those hot glue strings before styling these cuties. :)
It just proves us bloggers are real people with real lives. And some of us...maybe, kinda, might be...legally blind and failed to catch this until photo editing. So there. You now know I am legally blind even behind a lens.
I love the colors and patterns of this paper so much. :)
Here are some quick and easy steps to make these lovelies...
(sorry...they don't spin) :)
(sorry...they don't spin) :)
Fold one corner to the opposite corner on both sides creating a crease shaped like an "X." Cut on the folds until you almost get to the middle leaving about 1/2 inch.
Fold the left point down with the point towards the middle. If you start with the left like I did, pull the left side of the other three triangles too. Secure them with hot glue in the center.

Embellish the middle with a button or bead and hot glue a lollipop stick or skewer to the back.
That's it!
Happy Day Sweet Friends!
April 6, 2012
Pretty Skewers for Yummy Treats!
Happy Good Friday my sweet friends!
This day is a precious one as I ponder what my Savior did for me on this very day. I think of Him confronting death in the face, being rejected by His Father, and suffering tremendous pain.
And He did it willingly. For me. And you.
I am in awe of His love.
So I do wonder how many of you are actually reading blogs on this often busy weekend. But I came up with a really cute, last minute Easter favor for the kiddos or the kid at heart.
These DIY Wood Skewers are made simply by painting and gluing wood beads on the end.
That's it!
You need pastel paint (or any paint of your choice), paintbrush, glue gun, some wood beads (preferably unfinished), and some bamboo skewers.
OK. So don't laugh.
I could not figure out a simple way to paint these without smudging or spinning them. So I stuck two wooden beads on either side of a Q-tip to paint them. I pulled off some of the cotton until I knew it would fit but snugly. Then I dried them with a hair dryer.
That's right people. We can find craft supplies in the loo.
After the beads are dry, I put a little hot glue inside the wood bead and them pushed the blunt end of the skewer in and held it a few seconds until set.
Aren't they pretty?
Now make some Rice Krispies Treats.
I personally could eat a whole pan with no regret. I love them!
Now just cut out some small squares and put your sweet kebabs together!

I topped them off with a mini marshmallow, (so they would not poke an eye out or through the bags) wrapped them in cellophane, and tied them off with baker's twine.

A great treat for family, neighbors, friends, or a homemade treat for the Easter basket.
You could even dye the marshmallow pastel colors to make them fun and colorful. Or shape them like eggs or flowers or whatever. I was all about easy today. :)
I hope you enjoyed this and that you enjoy the precious time of Easter.
Hugs and so much love to each of you!
I want to know Christ and the power of his resurrection and the fellowship of sharing in his sufferings, becoming like him in his death, and so, somehow, to attain to the resurrection from the dead. Not that I have already obtained all this, or have already been made perfect, but I press on to take hold of that for which Christ Jesus took hold of me. Philippians 3:10-12
February 26, 2012
A Pretty Baby Shower
Happy Sunday y'all!
It has been a jam packed week over here with all the baby shower planning. But yesterday was the day and we had such a lovely time. So I just wanted to share some of the fun things I made to put this party together. I don't have a lot of photos because playing the hostess makes it hard to pick up a camera.

My friend Laura made these amazing cupcakes...they are SO GOOD! And I love that the cupcake picks were really tall. I like the look. I made them from a curtain panel I thrifted and some buttons.

I know you have seen me do a paper doily garland before but maybe it is still exciting since I added buttons? Hmmm...
Yes. Yes, I believe it is in fact thrilling to see a paper doily garland and now with added buttons.
I made this with bakers twine and double sided tape. So easy. And I used what I had on hand to cut costs too. Thrifty and thrilling. Oh yeah.
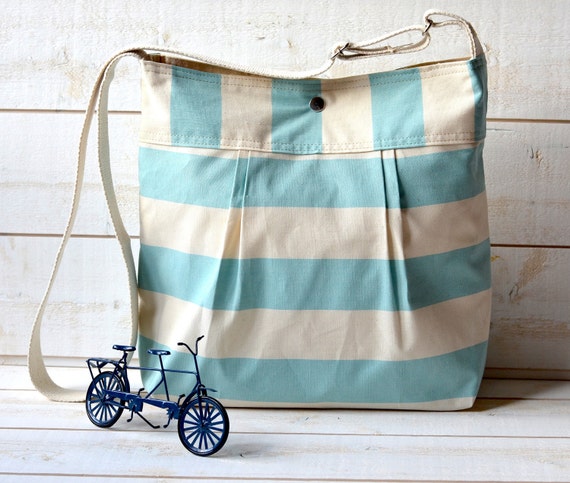
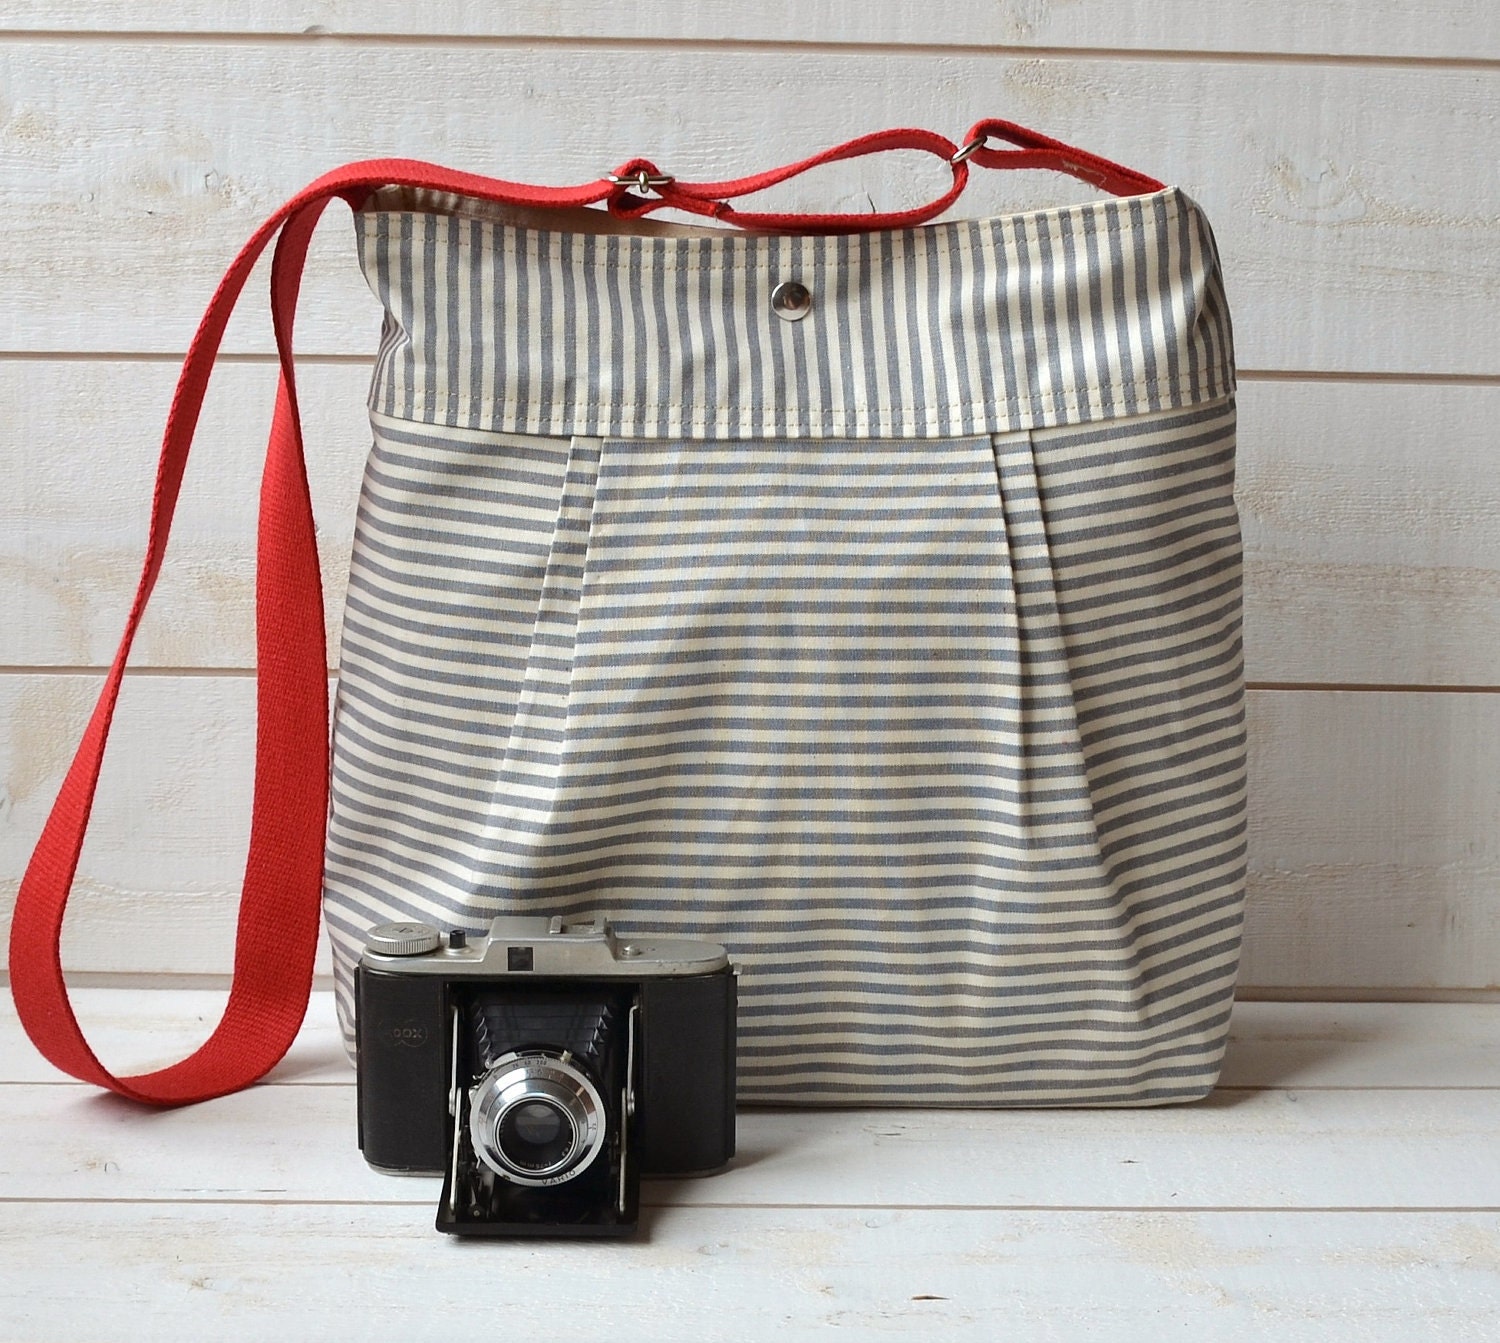
This was the only decent shot (even with an arm in the pic and looking a tad overexposed) I got of the embroidery hoop art hung over the fireplace. Thought you might want a peek. :)This is my BFF opening my gift to her. I am smitten with this diaper/messenger bag from the etsy shop, ikabags. I love, love these bags and I am so getting one for me! Here are some of my favorites...
Stripes make me ridiculously happy.
The shop is from France so you will pay extra for shipping but the quality of these handmade bags are amazing! I love them and wished I owned about 10 of them.Now back to other party details...:)
I made these cards for all the guests to write a prayer, blessing, or well wishing for the baby and Kelly. They are made with scrapbook paper and embellished with bakers twine and buttons. I had so much fun making these!
I found the frame on the side of the road ready for the trash during a little ride to look at Christmas lights back in December. Since my arm is still weak, I had my husband do the work of sanding, painting and adding the chicken wire to the frame. Then I just hung the cards with little wood clothespins.
Here are a bunch filled out. Aren't they so pretty like this?
The favors waiting by the front door were 4 oz mason jars filled with sugar scrub. A friend and I put these together and made two batches to fill 24 jars. One batch (doubled the original recipe) was 5 cups of sugar, 2 cups of olive oil, and 8 tablespoons of lemon juice. I got the recipe from Stephanie Lynn over at Under the Table and Dreaming. Her original recipe makes 12 oz so we just doubled it to save time.
I would have tied them up with string and pretty labels but with around 22 women there, I was just plain done in! And I figured the pretty tops were enough. :)
So happy I got to share this with all of you wonderful friends.
Have a fabulous day!
P.S. Sometime today or tomorrow, check out sweet Kimberly's blog who will be doing a series on parties all week. A great bunch of bloggers are sharing tips and tricks and I think some of my ideas will be included today..
Go check it out!:)

Labels:
Fabric Flowers,
favors and gifts,
party diy


