Image Map

June 29, 2011

Peaches and Basil... Amazing Together!

 Thought I would share one of my favorite summertime yummy goodness treats!
 I found this recipe in Real Simple (original recipe at link) several years ago and when I tried it I was in taste bud heaven.

For a single serve snack, this is what I do:
1-2 ripe peaches
fresh mozzarella 
fresh basil leaves (5 or 6) torn into small pieces
A splash of olive oil
Freshly ground pepper and a pinch of sea salt
(regular table S & P is just fine)

I make this for parties all the time too. ♥
Mix it together and get ready for an amazing, tasty treat!
  I love peaches, basil, and mozzarella but the idea of salt and pepper with olive oil intrigued me.
Are YOU intrigued?
You will not be disappointed. 
 Seriously.  Go make it.  Right now. And tell me what you think. :)

Fashion Headbands Giveaway Winners!

Good Morning Everyone!


Email me so I can get your information to arrange for your Fashion Headbands to be sent to you!

June 27, 2011

Picnic Theme Birthday Party Invitation

Hey Friends!  
Have I got a fun little party invite to share!  As you all know by now...the girls have birthdays coming up and they share a party.  So this year I decided I wanted to do a PICNIC THEME.  I have been tossing this idea around for months now and I still don't have a clear picture of what the party will look like.  But what comes to mind are old fashioned games I can make myself (ring toss, kick the can, hopscotch, sack races, etc), ready made picnic meals, and pretty sheets as picnic blankets outside. I am aiming for something simple and sweet.

So the first thing on the to-do list?
INVITATIONS!
 I thought it would be fun to send an invitation that looked like a picnic lunch.  The envelope would be the paper bag and using food images printed and cut out on white card stock, I made each item in the lunch...a sandwich, apple, milk carton, and napkin...contain the information for the party.
Anatomy of the Picnic Theme Invitation
Napkin (cocktail size) with Handwritten Message of Party Theme
Milk Carton RSVP
Apple Date and Time Card
Sandwich Birthday Announcement
 I made a little funny. Tee hee.

 I decided to fold the bag without taping it.  I originally planned on making the paper bags into envelopes and mailing them but I decided to save a bunch of stamps and hand deliver them.

But you still can do that if you need to mail your invites...
1. Place everything inside a flat and VERTICAL bag with the bottom still folded and facing up.
2. Fold the bottom up once.
3. Take the top half and fold into a triangle or point.
4. Fold it down and secure it with double sided tape or a glue stick.

To fold it like I did...
Lay flat with the bottom of the bag facing up.
Slide your picnic food tags/cards into the bag, all the way to the bottom while the bag is still flat.
 With the bag lying horizontal...fold  about 2 inches of the top of the bag down.
Fold the left side over to the right.
Label bag and tie twine around to keep the bag folded closed.  I did it this way so that when they untie and open it...it will be an actual paper bag instead of torn by tape.
This is the back secured with the jute twine. Baker's twine would be adorable too.
I actually tried doing this where the folded part was tucked under the flap but it would not lay flat so this way worked best.
How fun would it be to open up this invitation?

If you would like to make your own, I have a download of the clip art for you. This is a great idea for any kind of party and even great lunch notes too for back to school!


Click here to download (4 per sheet)


 Click here to download (9 per sheet)
Click here to download (4 per sheet)


What do you think of my fun invites?
You will probably see a  lot more of my projects for this party over the next month...hope you don't mind!
Happy Monday and Hugs to Each of YOU!

June 26, 2011

Giveaway: Creativity for Kids Fashion Headbands! (CLOSED)


What a fun, fun, fun giveaway I have for you and TWO of you can win!  

I was excited when Creativity for Kids asked me about participating in a giveaway.  They even sent me a free Fashion Headbands kit to try out with the girls and when I showed Cati the picture of it, she could not wait for it to get here!

June 24, 2011

Thrifting Cottage Style

Hello there friends!  
Just stopping in with a little note to say hi and to let you know I have been so crazy busy that I have not been able to be in the crafting mode.  And I miss it so! I have lots of things "in process." VBS is this week for the kiddos so I am driving all over the town, roasting in this Florida heat and wondering where the term lazy summer came from.  I mean, seriously!
But I did get a chance to do some thrifting this week and I was specifically looking for sheets. Sheets to make several wreaths (like this white ruffly wreath from the Spring) and other pretty things where I can FINALLY open up an Etsy shop.
I am going to get started on an actual inventory and then jump off this scary cliff. 
Can you believe it? 
I mean, I have been talking about it for almost 2 years.
You probably don't believe me anymore. :)
These shabby chic, cottage style sheets literally shouted my name. Literally.  It was eerie.  
The cheerful, light and airy colors.  Oh yes, I answered their call.
I already made this one out of a few of the pillowcases. 
What do you think?
An honest to goodness shop item...I am still stunned.
Just lovely, happy, little ruffles.

I hope to add garlands and some other fun little items but I am starting off with a narrow focus or I will never do it. I tend to lack focus, friends.  And time.  And sometimes resources. But I got it together and hope I can keep going.  

At the moment my focus is working on the girl's birthday party this year. They share a party with both their birthdays landing 2 weeks apart in the middle of the summer. Mommy loves doing parties but not two in a row.  I am so not a "Super-Crafty-Never Needs Sleep For Weeks On End-Still Has Time For Mascara" Mom.

So we do ONE party. :)

I hope to post the cutie patootie invites soon.  Stick with me...I got things in the works.  PROMISE!

Have a fabulous weekend everyone!

June 16, 2011

9 Years ago Today...♥

 I married the man meant just for me.

June 16, 2002.  A simple, outdoor wedding.
The best day...


June 14, 2011

Father's Day T-Shirts

 
I had no idea what I was going to do for Father's Day this year.  Not for all the dad's in my life or for my husband. No clue. So when inspiration struck, I was so glad it was not too scary, could be done in a day, and best of all?  The girls could help.

June 10, 2011

A Little Foodie Fun for the Fourth!

This post needs little introduction. 
I just came up with fun food ideas and treats with a 4th of July theme.
I also share some how to's and maybe some funny mishaps along the way.
Enjoy! 


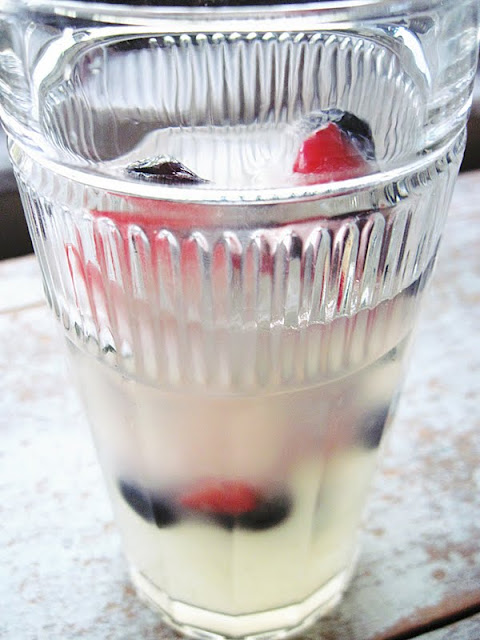
Berry Sweet Ice Cubes
You need an ice cube tray, blueberries, and strawberries cut into small pieces.
Just plop those berries in.  
(I used about 2 blueberries and 3-4 small pieces of strawberries)
When you are done...pop them in the freezer until set.

 All set!

Now pop them in a tall glass of lemonade.
Perfection.

Berry Kabobs with Yogurt Dipping Cups
Fill a small, single serve cup with vanilla yogurt.
Add blueberries, strawberries (maybe even raspberries and blackberries) on a 4 inch skewer.
 Oooh...add a some mint leaves too!
(I bet some granola for some crunch would be amazing too)
You now have some adorable red, white and blue (and a little green) single serve parfaits.

Star Cookie Ice Cream Sandwiches
 Bake some sugar cookies (or your favorite cookies) and cut them into star shapes.
 Pour some happy Red, White, and Blue Sprinkles on a plate!
 Scoop some ice cream on a cookie.

Smoosh another cookie on top to make a sandwich.
Dip it in the sprinkles.
Yummy 4th of July cookie sandwiches.
 Ice cream and cookies. Produces happy and somewhat hyper children. :)

 Flag Cookies On a Stick
 But these were so cute and since I did them with the girls I wanted to share.
Even though I did every bit of the icing and could totally lie to you and tell you they did it.
I try but I simply have zero skills in the cookie, cake, and cupcake decorating department.
I embrace this truth with humility.
I actually have a flag cookie cutter but I wanted mine on an actual stick so I just hand cut the flags and folded the end over a lollipop stick.
I just always make my cookies too thick so they end up looking like square pancakes.
Here is me waving my puffy flag.
 I am convinced some of you can do better and I hope if you make your own cookie flags, you will share your genius with me. :)

 Mini Ice Cream Stars
Now this one is not for the faint of heart.  I must say this little idea brewing in my head was harder to carry out in real life.  I should have kept it safely there in my head.  I wanted to make little mini ice cream cakes out of star cookie cutters.  I should have known cookie cutters work best with...you know...cookies.
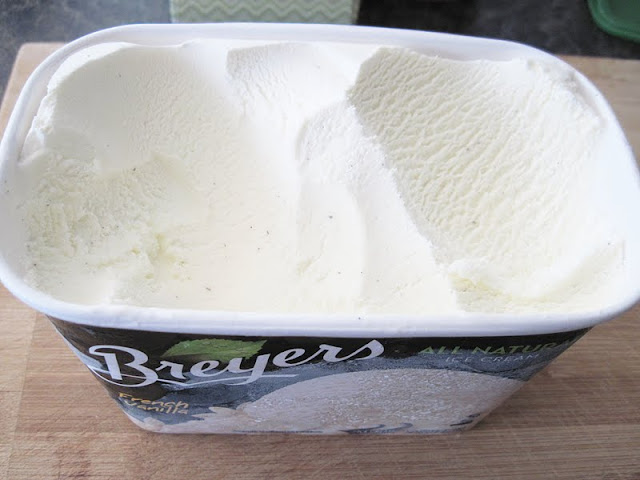
I bought some ice cream and um...ate some before attempting this little food feat.
Have more restraint then me.
I tore the carton off around the ice cream...
Which left me with a vanilla ice cream block.
I then sliced it like bread  in order to use the cookie cutters to make the shapes.
Um, ya'll?  Ice cream melts.
And I mean fast.  If I could have vlogged this experience for you, I would have.  It would have been entertaining...I am sure of it.
As I hyperventilated, I started cutting out the stars with my cookie cutters.
And putting them on a cookie sheet like they were hot potatoes.
And this is when it got interesting.
So I started going in warp speed trying to get a bunch of stars on my cookies sheet and it was just not working. It was melting so fast! So I decided to throw EVERYTHING in the freezer and crank up the temp to the coldest setting.  I put the cutters, my knife, everything in the freezer and then tried again.
 Most stressful dessert I have ever prepared.
I do NOT recommend it.
 But I thought you would enjoy my attempt at creativity. :)


Well that concludes my 4th of July Idea Parade!  
This was so much fun and I hope you came away with some ideas for the fourth and ideas for the Summer.
I like that a lot of these are fun for both us adults and for the kids.
Did you like it?

Thank you for your comments, sweet encouragement and friendship!
You are in my heart!

XOXO!

Linking to:
Tatertots and Jello
Show and Tell Saturdays:  Be Different, Act Normal