Image Map

October 30, 2009

Halloween Treat Bags

A girl just has to accessorize. Need the bag, the shoes, the jewels. It is just the delightful experience of being a girl. So I believe that Halloween should not be any different and when you have a costume, the bag is a MAJOR PART OF THE OUTFIT! You get goodies and treats in it for crying out loud. People give them to you on purpose and willingly! So I believe the bag should always make a statement.

For the last 3 Halloween's I have made a bag for Cati. The first year she was this adorable little strawberry fairy equipped with a headband stem and little booties. Beyond cute.


I made that strawberry treat bag to match the outfit. I used felt because...well, I love it. Plus it is really cheap, sturdy, and and easy to work with.


This is the bag up close. I used tiny little white pom poms for the seeds and hot glued sparkly green pipe cleaners over the handles. I also incorporated them to make fun little curly vines.
I am so excited that Ella will be wearing this costume this year. She is not so cooperative with head wear so we shall see how the evening will go.


My girls look so little in this pic! Last year, Cati was a UNC Cheerleader. My husband and both his parents are UNC Chapel Hill grads so they are Tar Heel crazy! So we decided to be a UNC family. Ella was wearing a onesie that said, "This IS My Costume!" She was 3 months and I was not worried about her having a costume. She did wear a Carolina sweater, though. :)


I also made her bag out of felt and foam sheets. Seriously, it is one night! Why worry about the fancy bag, you ask? Because I love it. It is fun to do and she looks like the cutie patootie she is.


One side of the bag and Ella's arm. I love the little Tar Heel on the bottom.

Other side of the bag. This bag got totally trashed because Cati dragged it on the ground when it got full of candy.

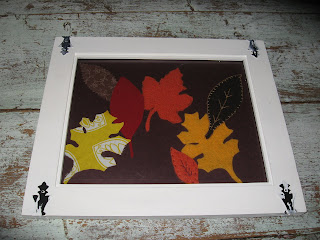
Here is this year's bag. Cati is Princess Aurora (Sleeping Beauty). I was seriously ready to not make one this year but I found this pretty fabric sample in a clearance bin at Joann's for $2. I bought a few yards of pink felt (she was very specific of what color pink she wanted) and gold ribbon and had no idea what I was going to do because the fabric sample was small. This is what I ended up with and added flowers all along the sides. It ended up super pretty and you can't really tell it is felt since I overlayed the other fabric on top.


I am sure I will have more pics of Halloween later. Until then...

October 28, 2009

Do You Know Etsy?

I bet if you gleaned any amount of enjoyment from a kindergarten project of gluing macaroni to a paper plate attached to a popsicle stick...you know Etsy.

This is a webby place no creative person should go unless you are prepared to adhere yourself to your chair and prepare to be inspired. A place that if hubby knows I am visiting, he turns off the light and goes to the bed to the sound of my oohing and ahhing over the ridiculously creative people there are in this world. How I love Etsy.

Not crafty or handy? That is OK. Because if you have an appreciation for beautiful, mind boggling, gorgeous things, this is a place to buy things that crafty, creative people make and sell. It really is an Internet vacation for me.

And here is something kinda scary for me to admit...

I so want to have an Etsy store.

This makes me incredibly vulnerable. I really do not think I can even compare to these magnificent, fabulous, creative people that are turning out such inspired things. But I also think if I don't try I will regret it. So I thought I would start here with all my friends that come to visit me occasionally. Would you mind letting me know what you think? I really want to know if this is worth even a half of a grain of salt to pursue and I know you will be sweet. Right? Kid gloves, people. I am so nervous.

OK. It all started a few weeks ago when my bible study asked for a volunteer to do "Life in a Bag." It is kind of like a grown-up show and tell where you put things in a bag that represent who you are and your life. Like pics of the fam, hobbies, etc. Tonight is my night so I decided to put something in there to represent my crafty side. Then I figured I would go one better and make something for all the lovely, sweet as pie ladies in the group. So I decided to make book marks since I have done it before, it was fun and easy, and it seemed appropriate for a bible study.

I absolutely love fabric so this was a lot of fun to make them a little treat with their initial on it. It is so much better than a paper book mark because it will last longer. They turned out so cute and I am really hoping the ladies like them. This photo is to show both the front and back and I made each one unique.
After doing these, inspiration came to me and I thought some really cute, applique looking ones would turn out nice with fabric on one side and a simple design on the other. I mean, it is only a book mark. I have a gazillion ideas so I started playing around with these just to get a visual.

I am pretty bummed that the pics don't show the detail as well. The flower one on the left has a pink button in the middle and a green stem stitched down to the bottom. It's hard to see. The bird as a little green bead for the eye and the fabric wing is cut with pinking shears. I smile whenever I look at the long bird legs.

These are so cute with inspiration from Pottery Barn Kids. I love the tree one which I did a spin off of the Brooke Bedding and the flower was an inspiration from a nightlight on sale.

Had to make a coffee one. I would take the stuff in an IV if I could. The steam is my favorite detail.


Not sure how I am feeling about these ribbon ones. I am totally digging the preppy one on the right. The one on the left is kinda crazy looking. But if I put more thought into the colors and design, it might end up cute.


So I was just wondering what you thought. Do you think they are sellable? I have more ideas than just book marks but just wanted your thoughts on my designs so far.

Be gentle.

October 27, 2009

Two Tips Tuesday

Tip #1: Spill Proof Your Dining Room Chairs

I had no idea that kids would be this messy. I mean, REALLY messy. Ella loves to just take her food and squeeze it until it oozes out both ends of her chubby fists and then will shake her hands until she has flung it all over the walls. Ugh. For a neat freak like me, it is a daily surrender to trust that this too shall pass. Meanwhile, my chairs have taken a beating with two kids. A few years ago I got a crazy steal on this cute dining table that I negotiated down to $60! I planned on distressing it but that plan is still in the works. And I grabbed these chairs at a yard sale for a steal and yep...you guessed it...still waiting for me to work my magic. When I found the chairs, I got green fabric in different patterns to cover the six chairs. Did I think ahead to the future? NO! I had 3 month old Cati at the time and did not foresee the destructiveness that they can descend upon cute, non-stain resistant fabric. I was not in practicality mode. Practicality does not factor in with fabulous style for me. Until now.

So I am at Joann Fabrics, my Beacon of Creative Light. Love the place. My crafty self could spend all day there and still not have spent enough time there. Anyway. They had a great sale going and they had reams of vinyl marked down 50% after already being on clearance. Does this scare you about my choice of material? Now hang on. I had asked around and got opinions on putting vinyl on my chairs. All were very credible but I decided to go for it. (Yes, most were negative). I found it in the luscious chocolaty brown (I love when people describe things with words like that and I love even more that this moment called for it) and I got 2 yards of it for $6.


It even kinda looks like leather right? Well, that is what BFF Kelly said and again, BFF Kelly always says the right thing. Especially when I have to admit to putting vinyl on my dining chairs. Love her.
The chairs turned out pretty cute and cleaning them is a dream now. You just wipe it and go. I am so much happier even though they are not as pretty anymore. The only negative? When you sit down on them they sound like the soft toilet seat my grandparents had when I was younger. As I kid, I kinda like it. Always soft. Never cold. And it makes that satisfying little FSSSHHHHHHHHHH noise. And there is something just funny about that. And I have no problem having hilarious but easy to clean chairs.

Tip #2:
Pretty Bookmark

Well, it was not my wisest choice but I bought these cute little hair clips for Cati at the $1 Tree. I know. But they were cute! And that is about all they are...cute. They hold no hair at all. But look at this? They make an adorable little bookmark! See? I am always thinking even though hair accessories on the cheap may not be the best way to use my noggin. I am a work in progress, friends.

Happy Tuesday!

October 20, 2009

Two Tips Tuesday

TIP #1 Lamp Enhancements

First off, cleaning lampshades can be a pain. Use a lint roller to remove dust, pet hair, and other fuzzy things to clean it up. It works great and does not damage your shade. Just be careful with shades made of natural fibers because you don't want it to pill.

Try putting a few drops of essential oil or fragrance oil to your light bulb. The heat will help emit the fragrance.

I always love seeing how people embellish a lampshade! There are too many possibilities to consider!
  • Glue pretty flowers all over and girl it up!
  • Add ribbon trim to the top and bottom. (You can even add beads to hang down and secure it with the ribbon. Ya know...bling up your shade).
  • Monogram a set of lampshades in your bedroom by purchasing or making fabric letters and adhering them with spray adhesive.
  • You can actually paint a basic paper lampshade.

What are your ideas?


TIP #2 Protect Recipe Cards

It took me forever to figure this one out. I have many a stain on my favorite recipes and they start to tear or fade over time. This preserves them and if something spills you can just wipe it off.
Buy some contact paper and place all those recipe cards you have written down, cut out of magazines, or printed from the Internet between two sheets of the contact paper. Leave about a 1/2 inch around the edge. This is also a nice way to give a copy of a recipe when requested.

Happy Tuesday Friends!

October 18, 2009

Our Annual Fall Photo!

Well here is our 2009 visit to the pumpkin patch. I was so excited this year because it was actually chilly outside. And so excited that we totally played hooky from church and went while it was still cool outside in the morning. The girls and I actually wore long sleeves and...drum roll please...hubby wore jeans, not shorts. Will wonders never cease?


Great pic.
Ah yes. Ella is a rather serious child. Often funny but toally dead pans for pictures.

Daddy & his girls.
The shirts are too cute and were given to them from my mother-in-law. Since we shall pass on a heritage of geekiness, Brandon and I dressed to match. So fun.

Me & the girls.

Cati and I discussing this white pumpkin at length. Must have been photo worthy.


Cate & Ella.
One of the only pics with them both looking. Total miracle.

Cati & a teeny weeny pumpkin.

Ella and some big pumpkins.

Ella and me.

Now I am off to post these same pictures on facebook because that is just what you do when you write a blog and social network.

October 13, 2009

Two Tips Tuesday

TIP #1 Seasonal Picture Frames

Officially, I am in full fledged, Fall decorating mode. Even in this crazy 91 degree weather. So I am inspired. These picture frames have had my engagement pictures in them and it is time they came down. They have been in there so long that we look like nerds and now we have aged a bit. They will be the pictures our children will cover their mouths, giggle, point, and say, "Daddy, what is up with your hair?"


As I was removing the pictures, I glanced over at my latest craft project (a felt leaf garland that is a pain in my tookus) and thought, "Who says only pictures have to go in picture frames?" So I put some of the leaves in the squares. It looked so cute! I propped it up on one of the two little wall shelves that flank the picture over my couch and made it Fall festive.


I did the same thing with this picture frame too. I also think it is fun to use large picture frames for other purposes like a tray or even a cute centerpiece on a dining room or coffee table.


This one inspired me to add some Autumn flair for a fake little coffee chat with a friend. Yes, I so staged this for this post. Anything on my coffee table would be smashed to smithereens by my 1 and 3 year olds. If you have a frame with a back that is really tight you can loop ribbon around both ends for handles and make it into a little tray.


TIP #2 Beyond Baking...


I love this tip! Hang a cookie sheet vertically in your kitchen like a magnetic memo board. Maybe try 2 or 3 in a row. I have a shopping list, recipe cards, and photos of my girls baking in aprons. I actually don't have this up in my kitchen. I just did this to provide a visual for this post but it really turned out too cute.

This is also a cookie sheet vertically leaning against my server in the dining room. I thought it kind of different to use one as a chalk board for the evening menu. Maybe for a dinner party? Note: That would not be a menu for a dinner party. But it was a fun idea.

Happy Tuesday and Happy Fall!


October 8, 2009

Yard Sale Chic

It has been awhile since I did a post with some creativity flair and this is one that may inspire some of you. As I have mentioned before, I have the bestest BFF ever. And being the cool, thrifty girl that she is, she picked up this memo board for me last Saturday for $5.

Five buckaroonies! I have to say this was a nice find. She found for herself one of those pottery barn wall racks to hold books for $10 because there was a microscopic section of chipped paint. I just love that other people's trash can be our treasure for next to nothing.


The memo board had some wear on it but fortunately I buy new furniture that looks like that. So all I really had to do was clean it and put some fun fabric on the bulletin board part since it was scratched and had some marker on it.


Now it looks fabulous and I even used material I already had. The littlest things get me so giddy! Can you even see the material?

Well, just thought I would share my fun little find. Sadly, I have no place to really put it now but I am way excited about having his adorable and updated memo board. Hmmmm...may have to rearrange a bit...

October 6, 2009

Two Tips Tuesday

TIP #1: A Bookcase Gets a New Job

So I have been re-decorating. I would actually call it post nesting. Specifically, for Cati's room. Ever since she came home to us, her room has been the one we initially did when we became foster parents. It was gender neutral in a happy yellow and I stenciled happy words all over the place. Obviously, it was happy.

But we never changed it until now. And I have wanted to change that room and make it all Cati's own with her personality. So last week we changed it. This all started when Ella kept climbing on Cati's toddler bed and then falling off of it. The kid knows no fear. So last Thursday I called hubby and said we need a bed TONIGHT! We got it and started the transformation. Hubby had already painted the room pink the weekend we were in Disney. I am so excited to do a before and after reveal in a future post but my anal retentive self has to be sure it is COMPLETELY done before I do that. But these pics will give you a sneak peek.

In a very momentary stroke of creativity, I realized I could reuse this bookcase my dad and I built together when I first lived alone in my own apartment. I always kept it because it was a nifty little shelf in a kitchen or bathroom or other small area.


Excuse the mess. We had just hauled out the toddler bed to put her twin bed in. Anyway, this is the shelf which had her books on it. And every day my Ella would pull every one she could reach out and on the floor.

See it tucked in that corner? Well that is where we put her bed now.

So I flipped the bookcase on its side and took those bins out of the wire cubes (see above pic again), put them in those slots and put it here in front of the bed as a bench. I plan on making a little custom, flat pillow but we shall see how creative Jess will swing that with her schedule. Turned out pretty cute, right? I figure lots of people could do this with a shelf at home. And IKEA probably already has come up with this on some furniture but mine was totally off the cuff. So there.

TIP #2: Reuse for Zipper Packages


I hate throwing things away that may have a possible use in the future. And I must confess that it is not because I am green. I just love containers. If all things were contained I think I would feel peace like a river. (If you know it, I bet you are singing' it. Tee hee. I dare you to write out the whole song in a comment). Wow. Am I brilliant at going on and on completely off topic or what?

So. Since I am in the organizational mood, I see a theme occurring on today's tips. Those pouches came from other products and I saved them. The yellow one is from a kids dinner set and I loved the packaging. I ended up putting Mr. Potato (I so just spelled that with an E and deleted it. Call me Mrs. Quayle) Head and parts in there because Ella will eat one of those things if I am not watching. No, not choke. Eat it. The other bag has puzzles. And again, Ella is known to take a piece and chew it beyond recognition. And yes, she has been cleared for vitamin deficiencies and pica. She is just weird but I am her mom so go figure. The other bag is what Cati's pillow sham came in. I LOVE THOSE BAGS. Glory be, they have zippers!!!!! Not only are things contained but they stay that way. Gotta love that. So here are other ways I use them...

  • Baby items I want to save but do not need like new bibs, infant toys, shoes in good shape, crib sheets, etc.
  • Linens to store like seasonal tablecloths, towels, napkins.
  • Store party supplies, bathroom odds and ends and even seasonal accessories like scarves, gloves and knit hats.
  • Craft supplies
  • Extra toiletries for guests or just in spare supply
  • Beach toys, art supplies, play doh
  • Great little see through container for baking supplies like sprinkles, cookie cutters, icing bags, etc.

Things that come in sturdy, vinyl, plastic bags are sheets, pillowcases, shams, crib bedding, comforters, curtains, and toys. I also sometimes will flip the label over to the white side to label them because I tend to forget. And my geeky self will label them from the computer too.

What would you use those bags for?

October 1, 2009

My Infertility Story: Parts 1-8

I wrote this story over 8 posts for a number of reasons.  I wanted to document the 5 year journey that led to my becoming  a mom.  A journey so incredible, so painful, so scary, and so beautiful that I would do it all again to have the same result: my girls.   I also wanted to encourage other women and families who have gone through the same thing.  I never want to forget what God had to do to mold and shape my heart to get me through the lowest valley of my life.  Because it helped me climb my highest mountain.  I also want to educate people a bit by letting them get a small peek into the life of being a foster and/or adoptive parent. My hope is to one day publish this story into a book to give to my girls.  To remind them of the magnificent God and King we serve.  And to always remember the road God took me on when...


The Story Behind Two Shades of Pink: Part 1
It's time. I have often wondered if this blog can sometimes confuse people. Do they wonder where the focus might be? Why I write stories one day, talk about how God inspires me the next and then throw a little crafty thing in there? 

But that's me. And I like it.


But you need to know how this all began. My journey to being a mother. How my life came to be at this point. At this moment. How the journey during these last 6 years have shaped me to be the person I am now.


This will be a blog mini-series of sorts. I am not sure if it will be daily or weekly because the story is long. Incredibly miraculous, so it is worth it. But I may have to return to a valley I have emerged from that was rather dark for me. Scary and hopeless (or so I thought). So I will do my best. My goal is to have my words here be a heritage to my children. Memories, creative fun, laughter, some tears and most of all, to thank my Jesus.

I am not sure how much humor will enter into this because this was a tough time in my life. You will share with me the pain of infertility, the path through becoming foster parents, understanding what it means to have radical faith, and becoming a mom to my girls. So here goes...


OK. I am staring at the monitor wondering how to begin this.

Let's start wiiiiiiith...Once upon a time...I got married. 


June 16, 2002 to be exact. A sweet outside wedding in North Carolina where we lived. My husband and I were friends for a year, started dating around Thanksgiving of 2001, engaged by February 2002 and BAM...married 4 months later. Things were great. I had decided to go on birth control three months earlier fearful that I would be pregnant too soon. Oh, how young and idealistic I was. Anyway, told my OB that I had not had my period in a year. Yes, a year. She said she really did not think we had anything to worry about. We could run some blood tests but did not feel it was a major issue. Okidokes. You're the doc, I will go with that. 


Within 10 months of being married, we moved to Florida and in November of 2003 we decide to start trying to have a baby. I have an annual check, tell them my plans, go off the pill and my period decides to be MIA for the next 3 months. I go back to my OB to find out what is going on, they run blood work and realize I have something I have never heard of before; Polycystic Ovarian Syndrome or PCOS. I had never heard of it but I had almost every single marker for having it. Always carried extra weight, still would break out like a teenager, my blood work confirmed it. The next step was an ultrasound of my ovaries which was the final confirmation since the ultrasound indicated a pearl like strand of cysts all over my ovaries. And so began a journey through infertility that I thought so naively was not a big deal.


Initially, it was not something I felt sad or worried about. I was not yet in the infertility trenches of yearning for a child. I was in the beginning stage of asking myself, how long will this really take? I will take some of these here chlomid pills, give it a whirl a few months and there you have it...we will make a baby. 

Uh, not what happened.


But in the process of this I began meeting fellow PCOSers. With children. Or pregnant. OK, so I was like what is the big deal? But after doing 3 cycles of chlomid with no indications of ovulation, it was time to be referred to an Infertility Specialist.

This is when allllllll the pieces began coming together to form the much needed BIG PICTURE for me. Here was the bottom line which finally became reality for me...it will be hard to get pregnant. Period. You kinda need to ovulate to make a baby. And I was not ovulating. At all.


OK. I am actually entering a sad place even with my two children sleeping peacefully in their rooms. So I am going to wrap up for today. It is the strangest thing. When you talk to anyone who has had a similar journey, you realize they never really can forget. The sadness and pain, I mean. My friend who has 4 children under 3 (triplets about to turn 3 and a 13 month old) still says it is hard to hear when people are pregnant. The same for me. And everyone I know seems to have a bun cooking or the timer just went off. But I will delve into that issue a little later. Just wanted you to get a sneak peek into the genesis of Jessica becoming a mommy.


Until my next post...or until one of these miracle babies do something funny again...