Image Map
Showing posts with label Autumn. Show all posts

October 1, 2014

Yarn Ghost Garland with Speech Bubbles

Hi Friends! 
I am so excited to share this adorably cute ghost garland with speech bubbles!  I shared this over on Eighteen25 for their Spooktacular September. I actually took this idea off of another Spooktacular project I did (these adorable Monster Cupcake Picks) but expanded on it to make this ghost garland.

October 15, 2013

Jack-O-Lantern Pinata


Hey pretty people.  Not sure if you caught this post over at Eighteen25 for their awesome September Spooktacular.  But my project was this adorable Jack-o-lantern Pinata.

And guess what? I have never made one before.  I have done paper mache and I figured a balloon would work but the rest was me winging it.  And I was surprised to find out that it's really easy!

Here's how I did it...trust me....

October 11, 2013

Friday Finds: Spotted on Etsy

Hello dear friends.
You know and I know...we all know...I am not exactly a consistent blogger.  But I am really trying hard to fix that and get back on track.  But as most of you know....blogging is crazy hard work.  So I would love to share things I come across that are absolutely too lovely to share. I hope to share these finds on Fridays.  I am not...I REPEAT...I am not committing to a weekly post.  I just can't.  But when I get the chance, I would love to come here and share some pretty things I find around the web.

I found such lovely Fall things on Etsy this week.  Since I live in Florida, I am a wee bit envious of all you cute things wearing your sweaters and boots. I so miss living in a place where you can own multiple coats. Sigh. I digress. OK.  Back to pretty things. Since I want to support handmade, and I am in an Autumnal mood, here are a few things I absolutely adore...

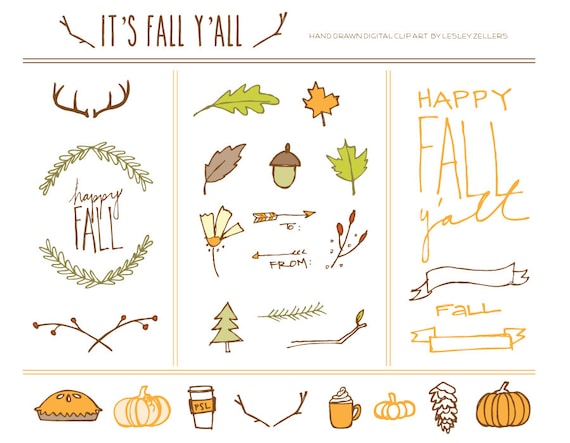
I adore this hand drawn Fall clip art titled "It's Fall Y'all" from Recipe for Crazy. I mean...she even has my beloved PSL!  I about died when I saw that.  So cute and I love the simple colors and sweet style. Check out the rest of her prints.  This one is my other favorite.

October 10, 2013

Apple Pie Kit + Printable


I'm praying you are not sick of the apple pie thing.  I promise today is the last day of all things apple pie.  But this one is short, quick, and super cute.

I have a thing for putting things in a little kit.  It makes ordinary things cute.  It's true. So this super easy apple pie kit would make a great teacher or hostess gift this fall.

October 8, 2013

Paper Bag Apple Pie


So as promised I told you I would show you my pie. Isn't that the craziest name for a pie?  I came across this recipe in a magazine years ago, copied it down and made it because I was so intrigued by the title. You literally bake it inside a paper bag. I tried it and it has become a family favorite.

October 7, 2013

Fall Leaf Pie Picks


It's Fall Y'all!
These very words are actually written on my chalkboard above the fireplace.  You may ask why this is necessary since this should be obvious...but not to us Floridians melting in the "Fall" humid air.  Upper 80's ain't no Fall, you feel me?  So this Autumn loving girl "fall's up her house" with leaves, pumpkins and orangey goodness along with the actual message that IT IS INDEED FALL. This is to make up for the summer weather that feels like a guest who won't leave.
Ah and speaking of leaves...

November 17, 2012

Casually Elegant Thanksgiving Tablescape

Sooooo...anyone still with me out there?  I always feel like I come back to post with a bunch of excuses for why I am so haphazard with blogging.  All I can say is...I will blog when I can.  I love blogging and I pray I always will keep up with it.  But for now...this season of my life is calling me to focus on managing my home and being available to my girls. Blogging is no longer a full time aspiration for me but a wonderful hobby where I hope I can continue to foster old relationships and make some new ones too.

So I am thinking a nice seasonal post with some Thanksgiving inspiration (a tad last minute) was a GREAT idea. And tablescapes are my heart and why I don't do more of them on here...I just don't know.  
Probably because I have like 2 hours of optimal sunlight to do it and I am usually knee deep into something else during peak photo shoot time. Which is why I LITERALLY dragged my dining room table through two french doors to my porch to take these photos.

October 8, 2012

Yarn Monster Cupcake Picks

In case some of you missed the ever popular Spooktacular over with the fabulous Eighteen25 girls, here was my project for this year...the cutest Yarn Monster Cupcake Picks I ever did see!

They are not hard to make and you only need a few supplies you probably already have in your crafty stash.

October 2, 2012

DIY Farm Party for Kids

I am so happy to share this sweet little farm party that I did for my little Ella's Pre-K class.  This ended up being such a fun one to prepare for and I enjoyed coming up with economical ways to make it cute without breaking the bank.  I knew I needed to get creative!

August 28, 2012

Fall Pom Pom Wreath

OK y'all, I am itching to haul out all the Fall stuff. This is my favorite, favorite, favorite season of the year and I am getting so excited!  So today I planned on a little craft with my girls.  The three of us tend to work on wreaths a lot and I have been working with yarn a ton lately so I thought we would make a pom pom wreath to go on their bedroom door.

April 24, 2012

D.I.Y. Burlap Bags + Mason Jar Favors

Hey sweet friends!  
Ready for more tablescape fun?
Today I have a simple tutorial to make burlap bags to cover mason jars along with some wood circle tags.

I have seen photos of pretty flower arrangements wrapped in burlap and I loved the idea for little favors for my table.  But I imagined me wasting more burlap then necessary and got very sad. I remembered I still had some burlap garland lying around from another project and found it to be the perfect solution.

And it ended up being crazy easy!
Here is what you need to make these...

Burlap Garland (found in the wreath section of a craft store)
Mason jars (size optional)
Twine
Natural Wood Circle tags (Or buy those unfinished wooden tags like these)
glue gun
scissors
 
First, I laid a mason jar on the strip of burlap to size the bag.
Then I folded the burlap over until it was slightly higher then my jar and cut.
I did this for all of them at the same time and just used the first piece to measure the rest.
To make the bags, I went for my glue gun.  I actually glued both sides at the bottom first so I knew how to line up the sides. This stuff can shift on you pretty easy.
Like this.
Then I glued the rest of the way up on each side being careful that it adhered because it is so thinly woven. 

Trim the top to make it straight and cut loose fibers.
Now you have a bag!
I placed my mason jar inside all snug and cute!
Next...Wood Circle Tags.  
I made these from a branch from my yard during the fall and had a bunch left over.  I simply sawed off the circles and drilled holes in each one.  I used alphabet stamps for the names of each guest at my table.
(that's me!)
Using twine, I threaded the two ends through the backside of the tag to the front leaving a circle of twine in the back to put around my bag covered jar.
After slipping it over the top, I pulled the two pieces to tighten it and tied a bow.
You end up with really sweet and pretty favors. 
(I added tulips which are my favorite flower)

And of course, you can use the bags in other ways... 

Fill them with goodies and tie them off with ribbon, twine, a clothespin, or unique clip.  
Package a small, handmade gift. 
Make a longer bag to present a pretty bouquet of flowers. 
Wrap it around a candle or potted plant. 
Gift some organic, whole bean coffee or scented soaps.
May Day flower gifts

So many uses! 

Obviously, they are porous so use them wisely (like don't pour ground coffee in there...hahaha!) 
But I think they are so fabulously versatile.

  Pretty easy bags for a pretty presentation. 
What do you think?

Love and hugs to each and every one of you!

April 21, 2012

Coffee Filter Flowers and Video Tutorial

Hello sweet friends!
It has been inexcusably long since I have posted.  I know.  But I do have legitimate reasoning.

The kiddos got sick.
The kiddos got ME sick.
Been preparing for an upcoming gala next weekend.
I have had 101 appointments and hence...no access to blog land. 

We actually have been going through a lot of personal stuff with our oldest daughter.  I promise, nothing alarming or worrisome.  But she has been having behavioral problems and struggling in school.  So I have been determined to get to the bottom of it and I think we are on our way to a solution.  It has taken all my time and energy which I have no doubt all of you are amazingly understanding about.

But GOOD NEWS...I am going to be sharing all the elements of this DIY Tablescape I have been working on.  I think you will like some of the ideas I have come up with. The gala theme this year is "A Knight in the Garden." Garden?  Flowers?  I am so in.

Do you remember last year's table?  Here are some photos to jog your memory...

So here we go with the first part of  Gala Tablescape 2012...
My idea was to have a bunch of flowers...I mean A LOT...all over my table.  I was going to make a runner, inspired by this, but my table is round so I figured I could just arrange a bunch in the center with some candle light. I realized coffee filters could be my solution.

I think I am the last person to get on the coffee filter flower train.  I have always admired them but to be honest, my crafty self can NOT pull it off. I tried all the different methods I have seen (rolling them with masking tape, roses) but for some reason, I am missing some coffee filter flower making gene.  So while failing miserably trying this...quite by accident...I came up with my own way of making them. 

And it's easy! 
Everyone chic scream for easy!
First I dyed them.  
I experimented with tea, food coloring, washable markers, and watered down acrylic paint.  They all work great but I had the most fun with food coloring.  I found I had a lot of leeway with it. You can even use kool aid too!  I just soaked them for about 10 minutes and dried them in individual layers.
The soft colors of these are so lovely.  
Here they are folded twice into cones and cut with a scalloped edge all ready to make the flowers.

Check out my video below with a step by step on how to make the flowers.  I needed both hands and I figured using my tripod for a picture tutorial would be more time consuming then just doing a video.  

I don't necessarily call this a vlog because  only my hands are in the video. But I guess it is.  I was probably sporting yoga pants, a hoodie, and working on day 2 of needing a shower.
I love being a mom. :)

Oh, and my voice sounds funny.  Kinda valley girlish.  Never knew that about me but whatever.
Or...WHAT-everrrr. ;)
Hope you like the step by step and let me know if you would want more vloggy tutes.

What do you think? Aren't they crazy easy for being so pretty?
BTW...if you want me to show you how to make these with a stem, I can do that too.
Here are a bunch as I was playing with as a practice run on my kitchen table (which is round like my gala table).  I think I am just going to have all the flowers loose to work as the centerpiece with those candlesticks in the middle to add height. Sorry you can't see a completed look but at least you see the flowers!


I will check in with you soon for another fun tutorial.  It's a favor and a place card in one. I'm just plain tickled I actually will be back soon! I hope you will be back too. :)

Blessings lovelies!

P.S.  I hope this will launch an upcoming 2x a month series called Tablescape Tuesday.
Details to come!

October 26, 2011

Pretty Lanterns: Diffuse Light with Lace & Fabric

 I feel like I am coming home after a really long trip...I've missed all of you so much! I realized I have not had a fun DIY in a while for you guys so I had to remedy that right away.  I am gearing up for the Christmas issue for Good Living Magazine so today's little project was one of the projects for it.
Lucky lovelies...you get a bit of Christmas fun a little early!  
Actually, this will be a warm up to November where I will begin sharing pretty packaging ideas throughout the month. I can't promise it daily but I will try to do a bunch for some fun wrapping inspiration!
But back to these pretty little lanterns!

I am excited about this one because I am also planning my table for the upcoming Christmas Tea at our church.  I think these lanterns in varying sizes would look lovely as a centerpiece.  These ones above were actually my little practice ones. :) My husband and I were at Lowe's this weekend and spotted a bunch of these lanterns on clearance at $1.08 a piece!  We literally filled up the cart with them and we bought over 20 of them. I know I will find just the perfect thing for them...oooh I can't wait!
I had this little project in mind for awhile now so I knew some spray paint love was in order. 
So I brightened them up a bit with white and found my happy place.
Sigh.  I just ♥ white spray paint.
Now for adding fabric to the removable glass panels. 
1.  I actually used craft lace and a sparkly organza material to cover the glass.
2. I used Mod Podge but I tend to be a bit heavy handed with it.
3. You can use a paint brush to spread it on.
4. But I prefer to get all messy and use my fingers.
After spreading the glue, smooth your fabric onto the glass.  Wait until they are completely dry before placing them back into your lantern.
BTW...You really don't have to be precise when you cut out the pieces of fabric.  Just lay the glass on top of the fabric and cut around it.  The edges are hidden on the inside.  
Be sure to place them inside with the fabric on the outside of the glass.
 They look so pretty with the tea lights in them!  
I love how the lace one is more see through but the organza diffuses the light with a soft glow.
I can't wait to do this for the Christmas Tea tablescape with the different sized lanterns.

Other Ideas: You could also use Vellum paper or the the plastic paper like I used for the lemonade mason jars at the girl's birthday party. Tissue paper would work too and look lovely with that diffused glow look to it.  Wrap lace around glass votives or even large vases and place larger candles in them. So, so, so pretty.  I might lace up every glass container I own!

I promise to be back soon...HUGS!


P.S.  I almost forgot...today I am at my sweet friend Tonya's blog with a guest post sharing the story of my faith for her 31 days series. 15 years ago today I met my Savior...♥


linking to:
the 36th avenue
a crafty soiree
show and share with southern lovely
someday crafts: whatever goes wednesday

October 20, 2011

Happy Owl-O-Ween Cards and Bookmarks

There is something about the cuteness of anything owl that always draws me in the Fall.  So I was totally excited when my new friend Courtney contracted me to design some Holiday goodies for her Thirty-one consultants for both Halloween and Thanksgiving. I was pretty excited. But knowing I needed to make 100, my goal was to make it cute but easy for me to turnaround. Plus, I wanted something happy and not too spooky. So these colorful and fun owl cabochon bookmarks seemed like the perfect solution.
First I designed the card using this completely fun owl clip art from the Etsy shop KPMDoodles Digital Clip Art. My idea was to have these cute little owls look like they are sitting on the branch on the card.
I ordered the owl cabochons from Suppliesagogo (I love saying that name) and the bookmark clips are from Everything Ribbons. As for putting them together, I just hot glued each owl cabochon to the top of each button clip.  Not sure if that is how you do it but that is how I did it...worked for me! :)

To attach the bookmark clip tot the card, I made two slits with a craft knife above and below the branch so I could slide both sections of the paper clip in it.

Like this.
The clip stays in the back so that nothing hides the front of the card. 
I tied raffia around each bookmark clip to give it more Fall flair. :) 
Here is the whole lot of them!

These would be a great idea to do for your children's friends or classmates too!  
It is quick and easy and inexpensive!
Such a fun Halloween project!

Happy Owl-O-Ween 
hugs to all of you!


This post sponsored by:

Speaking of cabochons...check out Popalicious Too for some amazing variety on cabochons and other fabric buttons.  And I have to be honest...I would have ordered from her in a heartbeat!  Her selection is unbelievable...she even has cute little owl ones too.